Tuesday, 15 January 2013

Malibu and Vanilla Bean Creme Caramel

Caramel is my adult Regina George. If you don't get the Mean Girls reference, caramel is that pretty girl in school that was mean and you hated but secretly you wanted to be her friend and was in awe of her amazing hair/skin/figure and the way guys just fell for her. I love caramel but I fear it. Sometimes it is sweet to me. It colours perfectly and smells devine. Sometimes it turns on me like a snake and crystallises into a white rock hard mess. But I can't walk away because it tastes so damn good... 

Practice will make perfect.... Right?

Creme caramel is a classic baked custard dessert. This version is fancied up with the addition of malibu rum in the caramel and vanilla beans in the custard. 


From Neven Maguire 'Home Chef', makes 7/8
400ml can coconut milk
100ml cream
1 vanilla pod, split with seeds scraped open
4 eggs plus 3 egg yolks
100g caster sugar

For the caramel
150g caster sugar
100ml Malibu


1. First make the caramel. Place the caster sugar in small, heavy based, not non-stick saucepan with 50ml water. Bring to the boil stirring so that the water and sugar are mixed together. Reduce the heat to a simmer and stop stirring once the sugar has dissolved. Otherwise the sugar will crystallise.
2. Continue to cook for 10 minutes at least until the syrup has turned a dark copper colour. If you have a sugar thermometer this is around 320-350oF/160-176oC. Take off the heat.
3. Pour in 100ml water into the hot caramel to prevent it browning further and burning. The mixture may splutter be careful. The caramel may go funny and lumpy at this stage. Add the malibu and return to the heat until the caramel has a thick consistency, like honey.
4. Divide the caramel among 7/8 ramekin dishes or small teacups that have been lightly oiled with sunflower oil and kitchen paper.
5. Place the coconut milk, cream and vanilla pod in a saucepan and bring to the boil. Turn down the heat subsequently and allow to cool slightly for 5 minutes so that the eggs don't scramble.
6. Whisk the eggs, egg yolks, caster sugar and vanilla seeds together until incorporated. Pour the hot milk mixture in in a steady stream whisking all the time.
7. Pass the mixture through a sieve into a jug. Carefully pour on top of the caramel filling each ramekin to the rim.
8. Bake at 140oC for 30-40 minutes until set to the touch but still a little wobbly in the centre, like jelly. The outside should be fairly firm.
9. Leave in the fridge for at least 2-3 hours but preferably overnight.
10. To serve run a sharp knife around the outside of the creme caramel. Place a bowl on top of the ramekin. Keep the ramekin/bowl at your chest level, then with your fingers on top of the ramekin sharply lower the ramekin/bowl to waist level until you hear the plop of the creme caramel out on the bowl. This may take a few tries of sharp movement.


Monday, 14 January 2013

Spinach, banana, clemintine smoothie

Anyone else a little bit scared of health food shops? I am sure I am alone in this (and other) peculiarity. Its the smell that gets me first and I'm pretty sure this is a common enough smell in health food shops. It is strong and strange, a musky smell mixed with what I would imagine to be the vapours of a deep well mine, soaked with minerals made from long dormant lava. You get used to it after a few minutes of rooting around but the initial blow as you enter the shop sends me reeling slightly.

Then my ignorance about wholefoods shows me up. I don't know what goji berries are, what fish oils are for or how to take macra powder. I have a rough aspiration of having the energy of a young cheetah and know that I should take something for my rubbish joints but have no clue of the product that is going to help me. The sales assistant is helpful but I always feel intimidated and out of my depth.

Joy the Baker had a post recently on this spinach smoothie which I have tweaked slightly. She mentioned chia seeds as a happy health food addition and after a bit of googling I learned that they are good for energy, boosting your metabolism (equals more cake) and full of antioxidants (equals good skin and hair). Milled linseed is available in most supermarkets and is also a good source of omega 3.

The clemintine orange adds a sweet hint behind the stronger spinach and peanut butter flavours.

Ingredients: Makes 1 large or 2 small smoothies
1 clemintine orange peeled
1 1/2 cups spinach
1 banana
1 tbsp peanut butter
1 tsp honey
1 cup soya/almond or cows milk
1/2 cup natural yogurt
1 tablespoon of chia seeds (optional)
1 tablespoon of milled linseed (optional)


1. Put the spinach, banana, peanut butter, honey, clemintine and milk in a food processor or deep bowl. Blitz for 30 seconds smooth. 
2. Add the natural yogurt, chia seeds and linseed if using and blitz for 10 seconds until incorporated. 


Friday, 11 January 2013

Cranberry and Hazelnut Bread


I love magic. I love Harry Potter and Lord of the Rings, and all the other witches and wizards of childhood imagination. I wish I went to Hogwarts, I wish I could say cool things like 'wingardium leviosa'. I wish I could have a staff like Gandalf the Grey/White. I wish I had a 'family secret' like Sabrina the Teenage Witch. I wish I could fall down a hole and go to an amazing tea party with a Mad Hatter like Alice. 

Sigh...

For today I think I will settle for the magic that happens when bread dough fills up with air and puffs up like a proud chest when nestled in a warm place. Because it is a kind of wonder and I still feel a little in awe of it....

This bread is delicious topped with good cheese and red onion marmalade. The cranberries are sweet with a tart after-bite and the hazelnuts provide a warm crunch. It is also great toasted and spread with butter and/or jam. 


Adapted from Neven Maguire's Home Chef

Makes two medium sized loaves

550g bread flour
1 tsp salt
50g butter, diced and chilled
7g sachet easy blend dried yeast
70g chopped hazelnuts
80g dried cranberries

1. Sift the flour and salt into a bowl. Rub in the butter until the mixture looks like breadcrumbs. You can do this with your fingers and thumb or with an electric mixer.
2. Stir in the yeast, cranberries and hazelnuts until everything is evenly combined.
3. Make a well in the centre of the dry ingredients and pour in 350ml/12fl oz of LUKEWARM water. If the water is cold it will work against the yeast and stop the bread rising.
4. Quickly mix until the water is incorporated and then turn knead for 10 minutes by hand or 5 minutes in a food processor with the dough hook. Place in a bowl that has been oiled with a dash of sunflower/olive oil and cover with a damp tea towel or clingfilm. This is to keep in the heat so the yeast will rise more efficiently.
5. Leave in a warm place for at least an hour, an hour and a half if you have time.
6. Punch the air out of the dough with a clench fist then divide it roughly into two round loaves. Place on a baking sheet lined with baking paper and cover with a damp tea towel and allow to rise again for about 30 minutes.
7. Preheat the oven to 220oC. Remove the tea towel and slash the loaves with a sharp knife. Put the loaves in a middle shelf. Bake for 10 minutes then reduce and bake for another 25 minutes roughly. Turn the loaves around halfway during baking for even baking.
8. The loaves are done with they sound hollow/light inside when rapped by your knuckle. They should be golden brown on top.
9. Allow to cool before cutting.

Wednesday, 9 January 2013

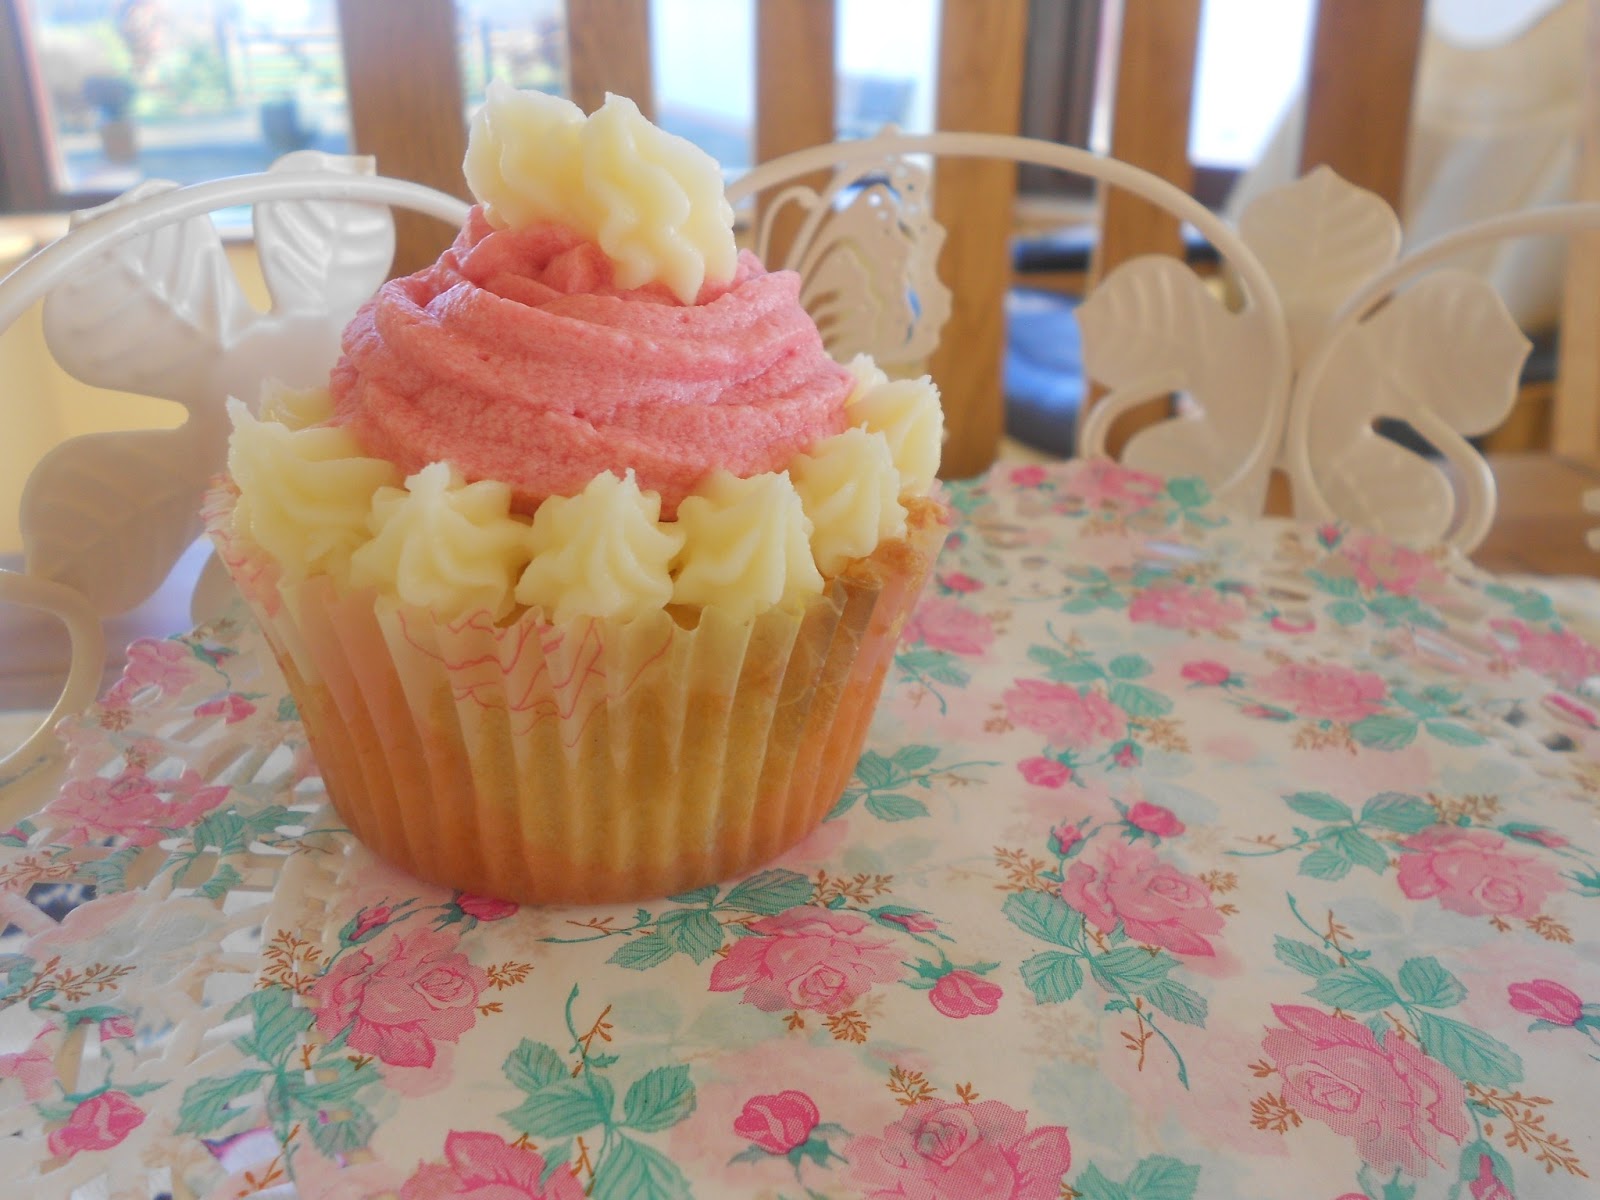
Natural Pink Raspberry Buttercream Icing


I never think that a drop or two of food colouring when I make my icing is going to harm anyone in the long term, but in an age where we are increasingly concerned about food additives, colours, e-numbers etc. etc. in our diets it is worth looking at natural way of adding colour to our baking. Berries are a great source of pink/red ink and also add a beautiful tang to cut through the sweet buttercream. It is easily done by adding shop bought unsweetened raspberry coulis or making your own which you could enslave children to do it is so simple. To me this buttercream tastes like those long cylindrical raspberry ice-lollies of childhood. Were they called Milky Moos?

For the raspberry coulis
1. Defrost 55g of frozen raspberries with a tsp of water for a couple of hours. When softened they will give out plenty of water. Mash with a fork. If using fresh raspberries you may need to add an extra 1-2 tsp of water.
2. Press the pulp through a fine sieve to get rid of the seeds.

Buttercream
75g butter softened
200g icing sugar sieved
2 tablespoons of raspberry coulis

1. Beat the butter and icing sugar together until the butter is a crumbed texture.
2. Make sure the coulis is warm/at room temperature. Heat in the microwave for 10 seconds if cold. Otherwise your buttercream may curdle.
3. Add the coulis and beat the buttercream for 3-4 minutes until lighter pink and there are no longer any lumps.

Tuesday, 8 January 2013

Courgette, Potato and Parmesan Pancakes


Things I learned at New Years: 
A. Don't put on red lipstick while drinking and without a mirror. Its a classy look but only when the lipstick is actually on your lips and not the surrounding area. 
B. Don't let yourself be filmed while dancing to Gangnam Style however hilarious the idea may seem at the time. You are not a dancer nor can you ride a horse. Both of these facts thereby disqualify you from conducting yourself with dignity. 

In other news Happy New Year!! I'm trying to get more veggies in my diet and these 'pancakes' (or I would probably call them rostis) are perfect for a tasty lunch or with a salad a light dinner. 

Slightly Adapted from Joy the Baker cookbook 
1/4 cup finely diced white onion 
1 garlic clove finely chopped 
2 cups grated courgette 
2 cups grated potato
small handful of parmesan cheese grated
1/2 teaspoon of salt 
2 large eggs 
1/3 cup flour 
1/2 tsp baking powder 

1. Saute onions gently over medium heat. Add the garlic when the onions are translucent. Shred potatoes and courgette with a box grater or a julienne (a grater like instrument that cuts veg into thin matchsticks, very handy if you make potato chips regularly or potato gratin). 
2. Season and then add the egg and parmesan. Mix until combined. Then finally fold in the flour and baking powder. 


3. Heat a frying pan with another tablespoon of oil. Shape into patties or use culinary rings/biscut cutters if you have then. No worries if you don't, just make sure that the pan is pretty hot before you put the pancakes on so that they hold their shape and don't fall apart. If unsure try flicking some batter on the pan. If it sizzles the pan is hot enough.

3. Fry on both sides until golden brown- about 3 minutes on each side. Serve with creme fraiche and grated parmesan (if your trying to be fancy).


Sunday, 6 January 2013

Easy and Cheap Teddy Bear Cake Topper Tutorial

I have gone off sugarcraft recently. I think that the styling techniques of the likes of Donna Hay (thanks Zita!), sprinklebakes.com or Lily Vanilli provide a more more spectacular way of decorating cakes. They use natural ingredients, flowers and petals or chocolate to imaginatively give a modern twist to cake decorating. I also admire the fact that this type of decoration can add to taste and texture as well reflecting the flavours within. 

All this being said, recently I was asked to decorate a Christening cake and I do think when it comes to childrens' cakes sugarcraft is probably the way to go. Fun, colourful and cute was the theme. Sometimes when you search the web or look at a sugarcraft book it seems that you need to spend a heck of a lot on paraphernalia- ball tools, glue, cutters, gum paste and I neither had the money or time to go to Dublin to buy that stuff. This teddy requires only fondant (the regular supermarket kind) and a little food colouring. And a lot of patience and trickery!

Things to remember about teddy anatomy: 
1. His head is oval
2. His ears are small compared to his head- otherwise he will look like a pig. 
3. His "feet" are disproportionately big compared to the rest of his body. The paws are big and round and come out from his body, something which I missed out on this time, I made the feet too small. 
4. His arms come out from just below his head. 

1. For the body mould a tear shaped ball of fondant. For the feet mould two pieces of fondant into small tear shapes. On the small end flatten them out slighly so that they will sit under his body. On the big end of the tear shape make small indents for his paw using your finger or a ball tool if you have it.   

 2. For the arms make two long sausages that get slightly narrower towards the end.


3. For the head make a big oval ball. Make two very small tear shaped drops for ears and a flat circle for his mouth/snout. Stick the flat circle to the bottom of the oval shape with some water and slight pressure. Make two small holes near the back of his head for the ears with a cocktail stick. Put some water on the bottom of the small ear teardrops and put them inside the small holes, moulding together any gaps. Flatten the ears out into small ovals.


4. To assemble wet the feet pieces that are slightly flattening and put the oval body pieces on top of them pressing slightly so that they stick on. Get a piece of spaghetti long enough to go through half of the teddy's body and position it in the centre of the tear drop. Allow about one centimetre of spaghetti coming out of the body because that is where you will stick on the head. 
5. At this stage take a sharp knife and cut one cm off the top off the teardrop around the spaghetti. This will ensure that Teddy does not have a neck- another lesson in Teddy anatomy! 
6. Carefully put your head piece on top of the spaghetti. 
7. Attach the arms by brushing water on the inside of the arms and pressing them gently on to the body. 


8. Now add any detail you like! Make little pink circle for the 'flesh' inside his ears and paws and attach with water. Make two black balls for his eyes and a larger one for his nose.
9. My bear is holding a heart, add any decoration you wish!

The finished product


Sunday, 30 December 2012

Cinnamon Crumble Cake

Reproduced from Joy Wilson 

I have no photo of this cake due to the fact that it got baked and eaten in a flurry of craziness that was a socialable post Christmas Friday. At Christmas you have to squeeze visitors and visits into your days stuffing your face with foodie delights along the way. Working over the holidays has seriously limited my social interaction but I was off Friday and managed to pop around to the cousins for dinner before dashing off for a more-civilised-than-our-usual-gatherings dinner with my friends. The fabulous host is more than capable of baking up a storm but I can never come empty handed to a party so I made this cake. When asked what is was I described it as an apple crumble, with sponge instead of apples. Yeah I have mad descriptive skills clearly....

If you love cinnamon you'll love this cake. Ripples of treacle-y cinnamon bursts through a moist sponge topped with crumble- delicious with tea and totally beautiful heated with ice cream or cream. I only made half of the crumble topping, finding that I had plenty. Don't skimp if your a crumble fan, I find it slightly drying. The cake mix could also easily be halved, I made a grill tray full of cake, around 38 x 28 cm.

From Joy of Baking by Joy Wilson

For the topping
4/5 cup of sugar
1/4 tsp salt
1 cup flour
1/4 cup butter (56g)

For the filling
1 cup brown sugar
1.5 tblspoon cinnamon
1 tsp ground nutmeg
3 teaspoons cocoa powder
1/4 tsp salt

For the cake
3/4 cup unsalted butter softened
1.5 cups sugar
1/3 cup light brown sugar
2 tsp vanilla extract
3 eggs
3 3/4 cups plain flour
1 1/4 salt
3/4 cup sour cream
1 1/4 milk


1. Make the topping. Rub the butter into the flour using your finger tips until it looks like breadcrumbs. Add the rest of the ingredients and mix with a fork. Set aside.
2. Make the filling by mixing all the ingredients together in a small bowl.
3. Heat the oven to 175oC. Sift flour in a big bowl and add the salt. Beat sugar and butter together until soft with an electric beater, around 4-5 minutes. Add the egg one at a time with a heaped tablespoon of the flour. Beat until all traces of egg is gone. Add the vanilla extract and beat briefly.
4. In a jug mix the sour cream and mix together. It will be lumpy but that's OK. Add 1/3 of the flour and 1/2 of the milk/sour cream at a time beating on slow. Add another third of flour and the other half of the wet ingredients. Continue with the rest of the flour mixing until only just incorporated.
5. Spread half the cake batter on a baking pan (Joy recommends 9 x 13 inches, it made slightly more for me). Sprinkle over the filling. Dollop the remaining batter over the filling. Use a knife to make just a few cuts marbling the cake. Smooth without bringing the filling to the surface as it will burn in the oven. Sprinkle over the crumble topping evenly.
6. Bake for 40-50 minutes until a skewer comes out clean.